Recreating a Classic 90s Screensaver – Mystify Your Mind – Another TouchDesigner Tutorial
****The code used for the Script SOP is below the Time Stamps in this description****
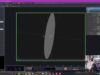
In this video, we’ll learn how to recreate the classic 90s screensaver “Mystify Your Mind” with TouchDesigner. The screensaver was originally found on the Windows 3.1, Windows 95 and Windows 98 operating systems.
We make use of the Script SOP to generate the geometric shapes found in the original. The Script SOP allows us to use Python Code to define 3D geometry. We then use typical rendering techniques to render this geometry into TOPs, and a Cache TOP to get the layered effect of the original. This tutorial is a great opportunity to experiment with classic 90s computer graphics (and pop culture), with all the benefits of modern real-time visuals!
Tag your images/videos with the hashtag #tdmystify if you give this technique a shot, so that we can all see the results. I’m excited to see what you make with this technique!
——————
Time Stamps
00:00 Intro
02:20 Network Overview
04:19 SOP Network – Script SOP
07:08 Writing Code for the Script SOP
25:34 Texture SOP, Null SOP
27:44 CHOPs – LFOs for Position Control
35:05 Rendering
36:32 Line MAT Settings
41:10 Cache and Cache Select TOPs
47:02 Adding a Second Shape
52:30 Adding Additional Layers
54:08 #tdmystify, Outro
——————
#CODE FOR SCRIPT SOP
# me – this DAT
# scriptOp – the OP which is cooking
# press ‘Setup Parameters’ in the OP to call this function to re-create the parameters
def onSetupParameters(scriptOp):
page = scriptOp.appendCustomPage(‘Point Position Values’)
p = page.appendFloat(‘Point1x’, label=’Point 1 X’)
p[0].normMin = -1.
p[0].normMax = 1.
p = page.appendFloat(‘Point1y’, label=’Point 1 Y’)
p[0].normMin = -1.
p[0].normMax = 1.
p = page.appendFloat(‘Point2x’, label=’Point 2 X’)
p[0].normMin = -1.
p[0].normMax = 1.
p = page.appendFloat(‘Point2y’, label=’Point 2 Y’)
p[0].normMin = -1.
p[0].normMax = 1.
p = page.appendFloat(‘Point3x’, label=’Point 3 X’)
p[0].normMin = -1.
p[0].normMax = 1.
p = page.appendFloat(‘Point3y’, label=’Point 3 Y’)
p[0].normMin = -1.
p[0].normMax = 1.
p = page.appendFloat(‘Point4x’, label=’Point 4 X’)
p[0].normMin = -1.
p[0].normMax = 1.
p = page.appendFloat(‘Point4y’, label=’Point 4 Y’)
p[0].normMin = -1.
p[0].normMax = 1.
return
# called whenever custom pulse parameter is pushed
def onPulse(par):
return
def onCook(scriptOp):
scriptOp.clear()
#assign position parameters to variables
p1x = (scriptOp.par.Point1x.eval())
p1y = (scriptOp.par.Point1y.eval())
p2x = (scriptOp.par.Point2x.eval())
p2y = (scriptOp.par.Point2y.eval())
p3x = (scriptOp.par.Point3x.eval())
p3y = (scriptOp.par.Point3y.eval())
p4x = (scriptOp.par.Point4x.eval())
p4y = (scriptOp.par.Point4y.eval())
#add a 4 sided polygon
poly = scriptOp.appendPoly(4, closed=True)
p = poly[0].point
p.x = p1x
p.y = p1y
p = poly[1].point
p.x = p2x
p.y = p2y
p = poly[2].point
p.x = p3x
p.y = p3y
p = poly[3].point
p.x = p4x
p.y = p4y
return
——————
If you have any questions as you implement this technique, feel free to reach out.
——————
This is the fifth video in a series called Another TouchDesigner Tutorial. More to come!
IG: @jackdilaura
https://www.instagram.com/jackdilaura/

![TouchDesigner Tutorial 53 – Case Study [Generative Design: P.2.2.4_01 Growth Structure from Agents]](https://alltd.org/wp-content/uploads/2024/03/touchdesigner-tutorial-53-case-s-320x180.jpg)
![(ES)TouchDesigner Tutorial 53 -CaseStudy[Generative Design: P.2.2.4_01 Growth Structure from Agents]](https://alltd.org/wp-content/uploads/2024/03/estouchdesigner-tutorial-53-case-320x180.jpg)