Interactive Networks in TouchDesigner For Playtron or MIDI – The Basics and Core Logic Part 4 of 9
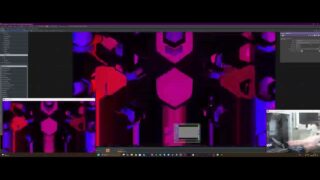
Remember, this video is the second part of Video 3 in this series. Here, we’ll cover how to create a simple interactive network. Get Project Files Here 👉https://okamirufu.link/project_files_collections
=============================
*VIDEO SUMMARY*
00:00 Intro
00:37 Fixing Instances: We’ll adjust the instance values so they work correctly
in the Geo component of TouchDesigner. Remember, we need to standardize
all values for the instances to function. For example, if we have 500 positions,
we also need 500 colors.
02:25 Creating a Network to Render a Sphere: This is the simplest step in the
entire project.
02:56 Grid Network: We’ll create a set of nodes to generate a floor with a
wireframe design, adding visually interesting elements to the TouchDesigner
project.
04:22 Cloning Spheres Using Lower Instance Values: Here, we’ll use Point Cloud
values and significantly reduce their resolution to clone spheres across the
composition while maintaining similarities within the coordinate system.
06:59 Basic Interactive Network: We’ll create a simple logic to control camera
movements, effects, feedback, and various Point Cloud files. In the first row of
the network, we’ll make a node to control the switch and activate blending mode,
so when switching between different content, we achieve a blending effect.
08:16 Resetting Feedback with a Delay Using the Time CHOP Operator.
09:45 In this third line of interaction, we’ll create a node to control the scale
values of the noise, allowing for more dramatic deformations.
11:50 Save the Cam: In this section, I’ll introduce a free component I’ve created,
available on Patreon. Save The Cam allows us to record different camera
positions and later use presets that enable direct camera movements or
smooth transitions using a Lag.
14:58 Create a Motion Blur Effect Using Feedback and Opacity Levels.
16:45 Adding Noise to the Scale of the Spheres: This means we can assign
different values to the spheres based on noise parameters.
18:51 Tweaks: Here, we’ll review which parameters can be adjusted to achieve
more interesting results. While this depends on personal preference, it’s
important to note that the Noise CHOP and Threshold offer the most potential
for altering the final particle outcomes.
–
*Free VJ Pack Collections – Over 150 Videos and Growing*
👉 https://okamirufu.link/free_vj_pack_y
*AI voice I used:*
👉 https://okamirufu.link/eleven_labs
–
*Lets Connect*
*Instagram:* https://okamirufu.link/instagram
*TikTok:* https://okamirufu.link/tiktok
*Pinterest:* https://www.pinterest.co.uk/okamirufu/
*Other:* https://linktr.ee/okamirufu
–
*Merch:* 👉 https://society6.com/okamirufu
*My Music* 👉 https://okamirufu.link/my_music
*Music Playlist* 👉 https://okamirufu.link/playlist_1
–
I hope you liked this tutorial! If you have any questions
Feel free to ask in the comments below.
Subscribe to stay updated on future tutorials
*Stay weird & Listen Music*
*Okamirufu*
#touchdesigner , #generativeart , #creativecoding , #digitalart , #interactivedesign , #vjloops , #motiongraphics , #newmediaart , #projectionmapping


![Use Mocap / Kinect Easily with UE5 & TouchDesigner [Tutorial] | Unreal Engine OSC](https://alltd.org/wp-content/uploads/2024/12/use-mocap-kinect-easily-with-ue5-320x180.jpg)
