Thermal Vision Effect: Creating a Heat Mapping Filter in TouchDesigner [TOUCHDESIGNER TUTORIAL]
Hi!
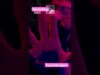
In this TouchDesigner tutorial, we’ll explore how to create a **THERMAL VISION EFFECT**, simulating the heat-mapped visuals seen in thermal imaging cameras. This effect blends scientific aesthetics with creative design, using color mapping and distortion techniques to achieve a dynamic, infrared-like appearance.
–
I’ll guide you step by step on how to layer and control various nodes, including *ramp*, *displace*, and *comp*, while sharing tips on how to refine colors, textures. By the end of this tutorial, you’ll have the skills to customize this effect for your own projects, whether for motion graphics, VJing, or experimental visuals.
–
If you want to dive deeper and access the project files used in this tutorial, consider supporting me on Patreon. You can download the files and much more by subscribing!
(http://patreon.com/Xtalcalx)
THERMAL VISION EFFECT – TouchDesigner Project Files
(https://www.patreon.com/posts/thermal-vision-124961947?utm_medium=clipboard_copy&utm_source=copyLink&utm_campaign=postshare_creator&utm_content=join_link)
–
As an artist, not a traditional educator, I’m excited to share my process and techniques for creating unique real-time effects in TouchDesigner.
– #touchdesigner
– #generativeart
– #creativecoding
– #interactivedesign
– #vjing
– #visualart
– #glitchart
– #realtimevisuals
– #livevisuals
– #digitalart
Don’t forget to subscribe for more tutorials and content!